This tutorial shows you how you can create a new scheduled task by using the Windows Task Scheduler. Creating a new task is a good way to test if your Windows user account has enough permissions.
How to create a new scheduled task
To check if your user account has enough permissions to create scheduled tasks in Windows, follow these steps:
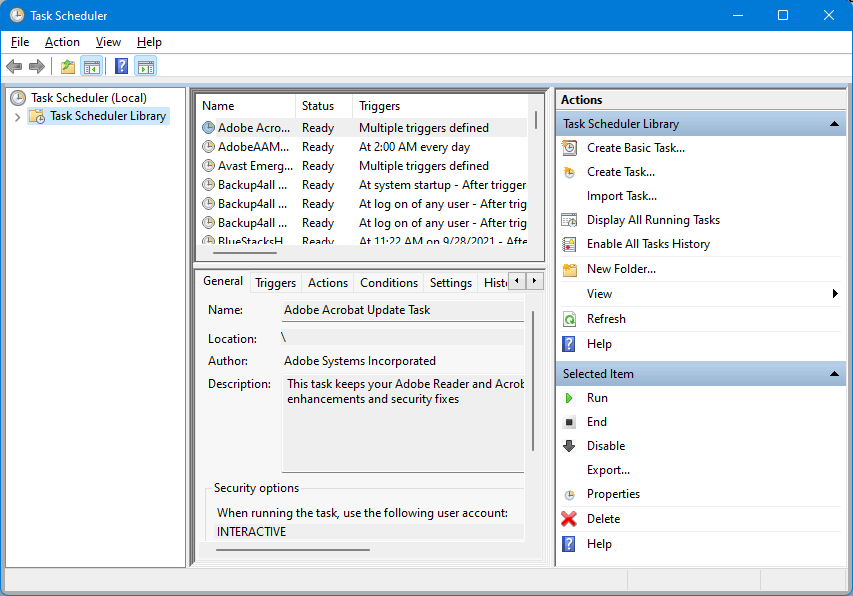
- Open Task Scheduler by going to Start->Control Panel->Administrative Tools->Task Scheduler.
![Task Scheduler Task Scheduler]()
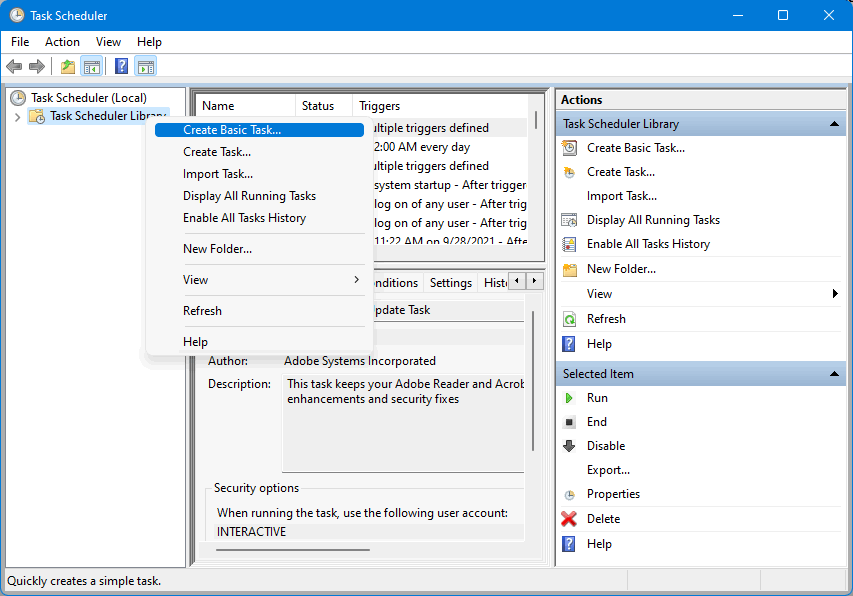
- Select Task Scheduler Library and right-click to open the context menu. Choose Create Basic Task.
![Create Task Create Task]()
- Enter a name for this new task and click on Next.
![Create Task - 1 Create Task - 1]()
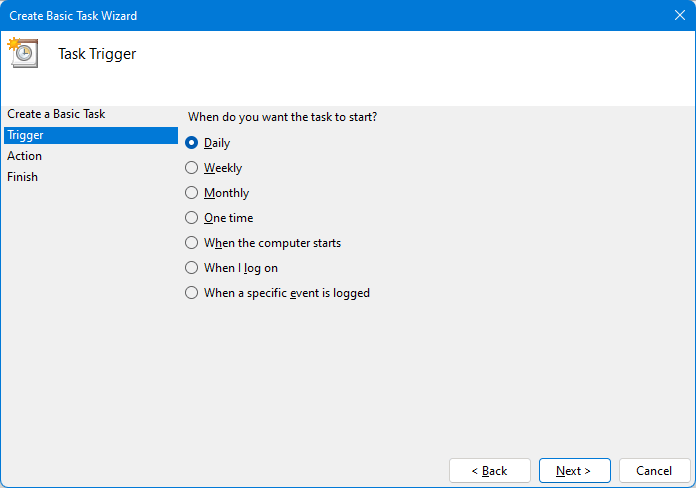
- Under Trigger leave it on Daily and click Next.
![Create Task - 2 Create Task - 2]()
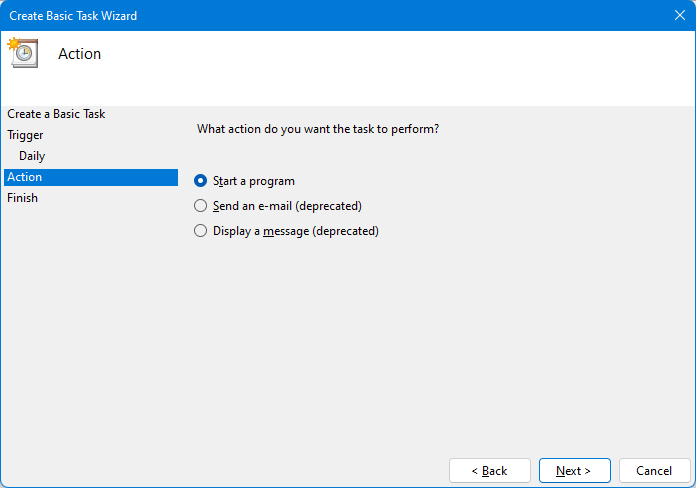
- As an Action select Start a program and click Next.
![Create Task - 3 Create Task - 3]()
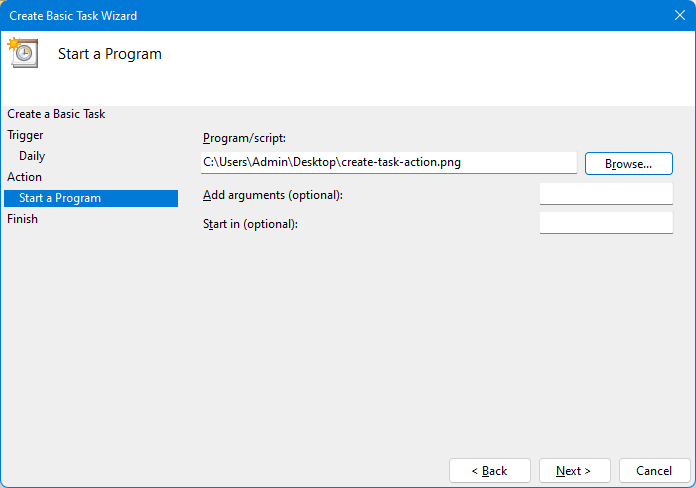
- For Start a Program select any program from Program Files and click Next. It can actually be any file as you only need to test this.
![Create Task - 4 Create Task - 4]()
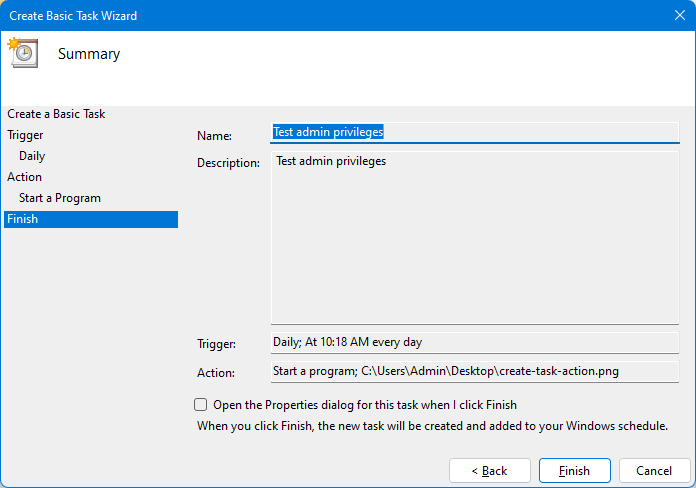
- Press Finish to finalize creating the task.
![Create Task - Finish Create Task - Finish]()
If your Windows account has enough permissions to create scheduled tasks, there will be no error message shown and the task will be created.
However, if you are logged in with an user account with limited rights you'll receive the message You do not have permission to create or run scheduled tasks. If the error message is shown, it means your user account does not have enough permissions to create scheduled tasks. You will need to contact your administrator (if your computer is part of an organization) to give you additional rights for creating a scheduled task.


