In this article we will show you how to test a backup using Backup4all. There are two types of test in Backup4all: - independent test for one or more versions of a backup (you can select any version for testing) - automatic test which is performed after the backup execution and will test the latest version of a backup
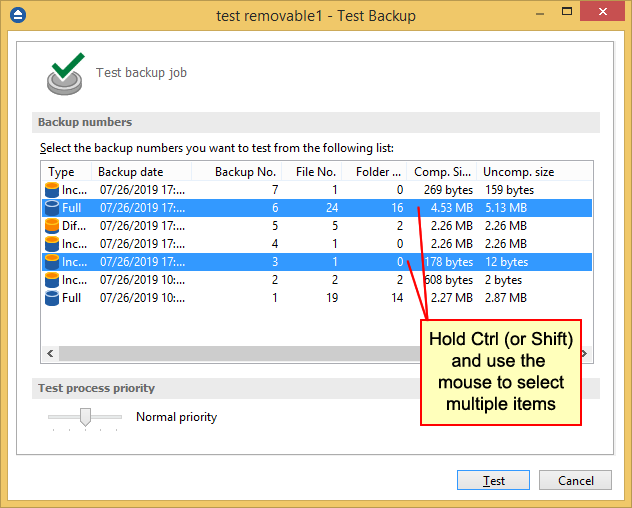
To test a selection or all the versions for the selected backup job, open the Test Backup window by pressing the Test button from the application's toolbar (or using the keyboard shortcut F9).

In the test window, select the backup versions you wish to test and press the Test button. You can also modify the priority of the test process by moving the slider to a lower or higher priority (default is Normal). A High priority process finishes faster but consumes more resources than a Normal priority process. You can also test a backup execution if you switch to Backup View, right-click on a version and select Test.
To be sure the test automatically runs after each backup, you should open the Backup Properties window by pressing the Properties button (Ctrl+P) from the application's toolbar and in the Advanced page make sure the Test after backup option is checked.
If the test was executed automatically after backup and it failed, the Error icon appears in front of the backup job icon. Read the log file for details about the errors (Job Logs->Last Test log). The icon will disappear when the backup job will be successful.


